Welcome to Big Horn Mountain Creations and Quilting......Quilt Stylist

Welcome to Big Horn Mountain Creations, Quilting and Embroidery.
Custom quilts and embroidery, also longarm quilting service. No two quilts alike, made especially for you. Feel free to contact me if you want a special work of art for yourself.
Grab a cuppa and enjoy the quilts.
Showing posts with label Josh & Michele's quilt. Show all posts

Tuesday, June 21, 2016

Summer Quilting

Summer Quilting

Catching Up

Where, pray tell, does the time go?

2 months gone!
I am happy to report that
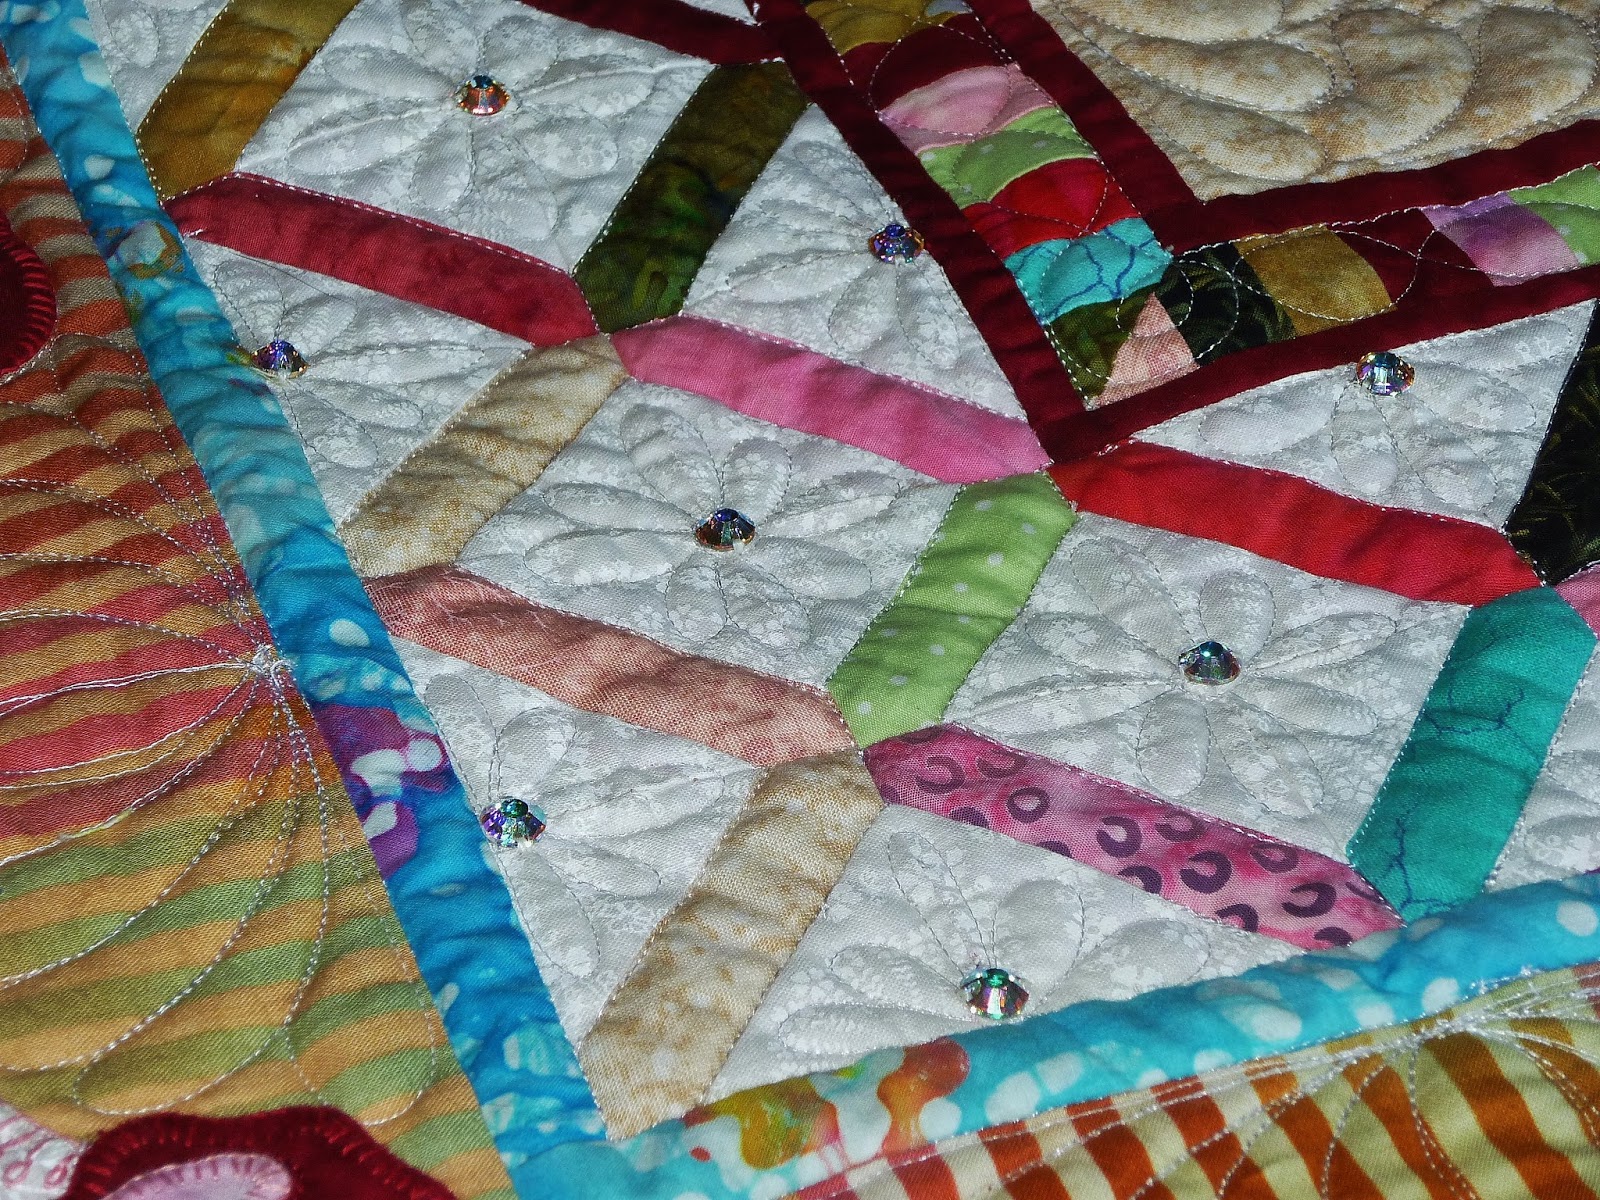
Lime-A-Lishes and Ruffled Roses 
are completed.
It is good to be done, but 
I have felt a little lost now that the work
on these two quilts is done, kind of like leaving old friends.

Both quilts were on display at our local quilt show
@ Cowboy Carnival 

Ruffled Roses
 Lime-A-Lishes
Lime-A-Lishes
will be going to its new home with Josh and Michele when
we see them in July.

I also put  a couple more items in the show.

A wall hanging that I bought the kit for, 
 from Shabby Fabrics.  
There are two more in the kit that I need to finish up.
 My replacement travel bag.  
Again like losing an old friend, but now have gained a new one.
This bag was fun, in that, all of the fabrics, but one (the stars) were gifted
to me by another quilter who was cleaning out her stash.  
So now when I see this bag I think of Sue.

I have entrusted with a couple of commission jobs since April.

First an embroidery job, 
Martha is doing a wedding quilt and needed some
embroidery work done for it.

These both stretched my skills

With this first one, the lettering is quit large which
did not allow all the words to fit into one hoop.  In order to 
accomplish this large design I had to move the hoop 4 times.
 In order to make sure they were lined up beautifully
....a lot of measuring and nail biting was required.
but I got it done and am very happy with the outcome.

I did test samples first to make sure I
had things where I wanted them and to be able to make
any corrections before stitching out these final pieces.
 With the Love panel I had to line things up vertically, with the main
body aligning to the left.  This one took 6 hoop changes.

  
One last share today, I do have to make up for not posting right?
Another commission.

Gary's Harley quilt
Finished this up last night, now to get it into the mail.

I hope you like it Gary.
 Love having the embroider machine so I can add special details like names.
 Label for the back. 
I wanted the fabrics to shine so I did a simple meander for the quilting.

Well, that is it for now.  Up next.........time to make
new quilts for the grands. 

May your day be filled with blessings.

Tuesday, April 26, 2016

Lime-A-Lishes

Lime-A-Lishes

The Lime, Black, White and Grey quilt is DONE!
and it has a name.

Lime-A-Lishes

I am happy to say I have put the last stitch 
in this amazing quilt.

This quilt is big, VERY BIG
112 x 112 inches
shown atop a king size bed.  
I hope to get a better picture when it is 
hanging at the quilt show.
 Though the binding is not on here, it is now on.
Label is on.  

Lime - A- Lishes 
is done.  
A year this month and full of 
many hours of loving, prayerful stitches 
for my son and daughter-in-law.

A few more details below of the quilting.


Monday, March 28, 2016

Quilting Updates-Ruffled Roses & Lime top

Some Final Touches

Ruffled Roses & Lime top

Work continues on my Ruffled Roses quilt, the addition
of hand sewn swarovski crystals is complete.  
I wish I could have picked up the sparkle of the crystals.


Next I will be adding bow shape beads under each of the
flowers between the swags on the stripped border.
Then it will be done. 


I also have been continuing the longarm work on 
Josh and Michele's quilt.
At 4 weeks now on the quilting but of course I don't work
8 hours a day, general 3 to 4 and not every day.
Some days just are not good days to do this work, so
I only work 4 to 5 days a week.

I am just 2 more away from this border of lines being done.
Working on the lower half of the quilt now.
Upper half is done, then it will be time to turn the quilt
to finish off the last border which will be feathers.

I also made a new travel bag, my current one is
falling apart.  I did fix the broken hand on it but decided
it was time to do something new.

 Love how it turned out.
I will add one more detail, a monogram
with the embroidery machine, just have not done it yet.

A fun note about this bag.
I attended a quilting retreat in January, 
a couple of the gals brought bags and bags of fabric
they did not want anymore, yardage upon yardage.
All but one of the fabrics (the stars) came 
from the yardage they brought and gave to the rest of us.
Thus, this bag will always remind me of that retreat.
Thank you ladies.

Have a wonderful week, see you soon.

Saturday, February 27, 2016

Quilting on the Lime, Black, Grey & White

Quilting on the Lime, Black, Grey & White

A peek at the quilting on J&M's quilt. 

Center design


Ruler work on first border.


Tuesday, February 23, 2016

J&Ms Lime Quilt Pt4

J &M's Lime Green Quilt

Part 4  

It is on the longarm!
I have never had a quilt test my skills quilt like this one has.

I am pleased with the out come so far.  
I started this quilt nearly a year ago
for my son and daughter in law.
I was given the colors
lime green,
black,
grey and white.
The rest was up to me to design.

Once the pattern and fabric were decided the piecing began
but I was not happy with what was happening so
I changed up the blocks.  I made tons of  lime and black
diamond blocks and some of the logcabin corner blocks.
This is where changes began, the corners just did not work in my eyes.
So I redid them.
Next I started putting the main blocks together but 
I could see that this was not going to be pleasing. 

After much pondering and some inspiration,
the idea to do different pieced borders came to light.
Thus you see 4 pieced borders and several floaters
(borders that are plain but fill space).
Each border was a thought process and I can say I like how 
they all turned out.  I was able to use up all of those many
lime and black blocks as you can see in the picture below,
they became one of the borders AND enough to make 
more larger blocks to make the backing bigger (below).
Some close ups of borders
This quilt is 112 inches square and the extra wide
backing fabric only come in 108 inch widths, so
those extra blocks I mentioned a moment ago became 
part of the backing.  You can see them reflected in the 
mirror below.
Then I had to load this bad boy on my machine.
Noting that there is a center to this backing, which normally
is one piece so makes no difference if it is centered or not.
 Not the case this time,  finding the center was not a
problem, but wrestling  something  112 inches square 
is another story.  LOL 
Normally when I work on the longarm, I start at the top
and work down but with this needing to be somewhat centered
I will start in the middle and work my way out.
It is hard to explain all the ways this has tested my skills.
Perhaps we could compare it to raising a child,
alot of love, and patience were involved.
Next up, the quilting.

Wednesday, October 28, 2015

Lime, Black, Grey and White Quilt...Part 3

Lime, Black, Grey and White Quilt

Part 3 

Moving along on the borders of this quilt.
I was not sure what to do next to add the diamond border.
I did not like it right against the light grey


After considering things, I decided to add
a lime 1" border and a black 1" border.
I chose to sew them together before adding them.
Next the diamonds will be added
and another 1" black border will go on the outside.


Hummm.......this presented a problem
 I did not discover until I began sewing
                                                                 the two borders on.
Because I first sewed the borders together, they would
overlap at the corners in a way that would not work. 
After some consideration, I decided to add a corner block.

Now you can see the diamonds and how they
will line up, I believe a lime square will
go in the corner where they meet up.

That is for another day, more diamonds to sew together.
 
The top will measure 88 inches once the diamonds are on.
I hope to make it 96 inches square so that once it is washed
and shrinks up a little it will be close to the 90 inches wanted.

So what will the final border be?  Perhaps a piano key?  I am running out of
fabrics so will have to consider what to do next.  

Until later,
May the Lord above bless your richly.  

Friday, October 23, 2015

Lime, Black, Grey and White Quilt

Lime, Black, Grey & White Quilt

1st
 pieced border for the quilt.

Corner detail

What a difference a border makes.
 
I think I need a bigger design wall.
Flannel ordered to make a bigger design wall.

Border #2

Half square triangles in dark grey, light grey and white. 
(trying out the next border on the
  
 Corner details

Saturday, October 17, 2015

Lime, Black, Grey and White

Quilting in 

Lime, Black, Grey & White

My latest project is for my son and daughter-in-law.
Josh and Michele

They wanted lime green, black, med grey and white.
Well this is a very lime top!
After making about 16 blocks I decided I did not like it
So something needed to happen.

 The block design is one I got from Quilters Cashe
she has tons of blocks there and all for free.  Thank you Marcia.

The pattern is called Fading Star


I know the colors are hard to see, 
sadly my camera is not picking them up to well.

The black has lime green dots.  What looks like yellow
is a bright, bright lime and white.  Then two different limes,
one with teal seed shape, shapes.  
 I changed it around a little because I did not like how the
fabrics I had chosen worked out.


As I mentioned I did not like the idea of a whole king
size quilt done with just those blocks soooooo
I had to figure something out.
I am a member of Craftsy.com 
and there is a class I am taking called Finishing School
by Winnie Fleming.
She teaches about making pieced borders.
Now I have done this before on my Ruffled Roses quilt 
but it never crossed my mind.
I began making borders to add to the center.
 First came a black border, next a lime border
both plain borders.
Next a 4 patch border.
Starting with a 4 patch with 1 1/2 finished squares


 Add half square triangles one in lime and one in grey
 Stack them like so and sew together to create
 this border, which will be added to the last lime border
 for this.
 Next make half square triangle squares
 which will be added thus
to create this.
What next?  I don't know yet.  
First I need to finish the other 3 sides, 
so I am off to sew.