Ginny's Flanged Binding
I thought I would do a tutorial on
a machine binding technique that I learned
from Ginny Singer while at a quilt show.
She had done her quilts this way
and shared with me how she did it.
I changed it up just a little bit, but it is still
her idea.
I have never been happy with the results of machine
binding until this technique.
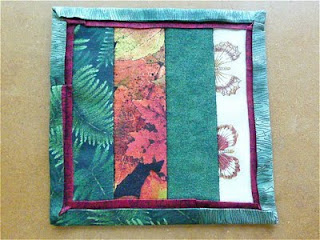
First I wanted to share a picture of my first attempt
at this way of doing the binding.
This is on my daughters quilt.
Alright, lets cut our binding. I used 2 1/2 inches, prepare
the length as you normally would. I did not do bias here, just
cut across the fabric.
Next cut a 1 inch strip the same length as your binding
piece it together as you desire.
Spray your binding with spray starch to help get a crisp fold.
Press in half length wise both pieces.
Be careful not to stretch the fabric which is easy to do.
Now open the 2 1/2 inch binding up, laying it flat.
Place your accent piece (flap) on top, so that the pressed
fold of the large strip in centered down the middle of the
flap, stitch that on about 1/8 inch from the raw edge.
It should look like this.....
with a little space between the fold line and the stitching to create
a small flap, that will help hide the stitch line when you sew it down.
Now, fold your binding in 3rds, like this using the stitched line
of your flap to aline the back side. You do not need to do the
whole thing this is to get an idea of how wide you will stitch the binding on.
When you open it back up, place it under your presser foot
lower the needle and this will tell you how far in you stitch line needs
to be. See how mine is on the outside of my 1/4 inch foot?
Use this measurement to sew on the whole binding.
Trim away any excess binding you may have.
Apply the binding just as you normally would.
Except....sew it to the back, not the front
To connect the two ends, I do the bypass/overlap method.
trim away excess layers where needed.
Pull the binding to the front of the quilt
I suggest pinning, like this......
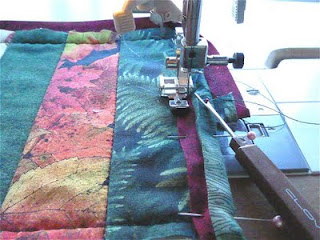
So you can put your zipper foot on and move the flap aside,
sewing up close and letting the flap go back over the stitching.
The seam ripper helps hold the flap out of the way.
The corners are done the same as normal, but you will
need to stop and cut your thread, then start again on the
new side.
Try not to sew past the line of stitching that attaches the binding
or you will sew into the binding on the back
this is the back view, can you see where I over sewed my line?
Here is the binding on my daughters quilt, it was much easier
to work with then the small sample. It does take some
tweaking on these corners but the result is worth it.
A close up of the stitching on the front and under the flap.
I hope my explanation is clear, if not let me know if
I can answer any questions.
Give this a try and let me know if you have
any ideas to make it better.
Thank you Ginny for sharing this with us.
May God Bless and Keep You!


