Welcome to Big Horn Mountain Creations and Quilting......Quilt Stylist

Welcome to Big Horn Mountain Creations, Quilting and Embroidery.
Custom quilts and embroidery, also longarm quilting service. No two quilts alike, made especially for you. Feel free to contact me if you want a special work of art for yourself.
Grab a cuppa and enjoy the quilts.

Saturday, December 18, 2010

Finished Slippers..........

Finished slipper collection.
Warm footsies in the future.
Once I figured out how I wanted these to look
they went fast and I did the last 3 pair in an afternoon.  
For a tutorial, see my last post.


Friday, November 12, 2010

Slippers for Christmas

 Awhile back I shared some slippers I made for my youngest grandson
just the beginning of making a pair for each of the kids

 To cute aren't they.
This is the pattern I used to make these cute little slippers
you can find it on Keepsake Quilting.com

I also found this pattern over at the Pink Slipper Project
Have you heard of this great site.  They organize and collect slippers to give to 
displaced women and their children.
Aren't these slippers just darling.
I used both patterns to inspire me.  I did not want the raw edges or the binding,
  so this is what I did.

After making a test pair I lengthen the 
sole by 1/2 inch and widened the heal by 1/2 inch on each side.

Here are the main pattern pieces, just two
the sole and the toe.

Place the sole pattern on the fleece, cut 4 pieces, and cut 2 pieces of batting.
I am using cotton batting

Cut 4 of the toe pattern, I am using flannel, and again 2 cotton batting.
I tried using fleece for the toe also but it is just to thick for my liking and for the machine to sew.
Oh the machine will sew it but it is hard on it, not worth it, besides I like how this looks better.

One pair cut.  
Note: you can use scissors if you don't have a rotary cutter, 
the rotary cutter will save you quilt a bit of time and is easier on the hands.
To assemble start with the toe.  
Place the batting on mat, top with one piece of the 
flannel wrong side against the batting,
top with the other piece of flannel right sides together.

It is helpful to have a walking foot to work with this many layers.
What the walking foot does is feed the top and bottom fabric evenly
because the walking foot has feed dogs, too.
You can do it without, though it may be a bit more difficult.
Sew the 3 layers of the toe together at the top, about 1/2 inch from the crescent shaped edge
Clip the curve, it helps when you turn it to have a smooth edge....
turn so that both right sides enclose the batting.
Next sew a 1/4 inch from the new finished edge to top stitch.
Also sew down the raw edges, just to make it easier when attaching the toe to the sole.
Trim of the little wings (above)
Now it is time to join the toe and sole.

Place the batting down first, then one of the fleece sole pieces
next the toe piece, and top with another fleece sole.
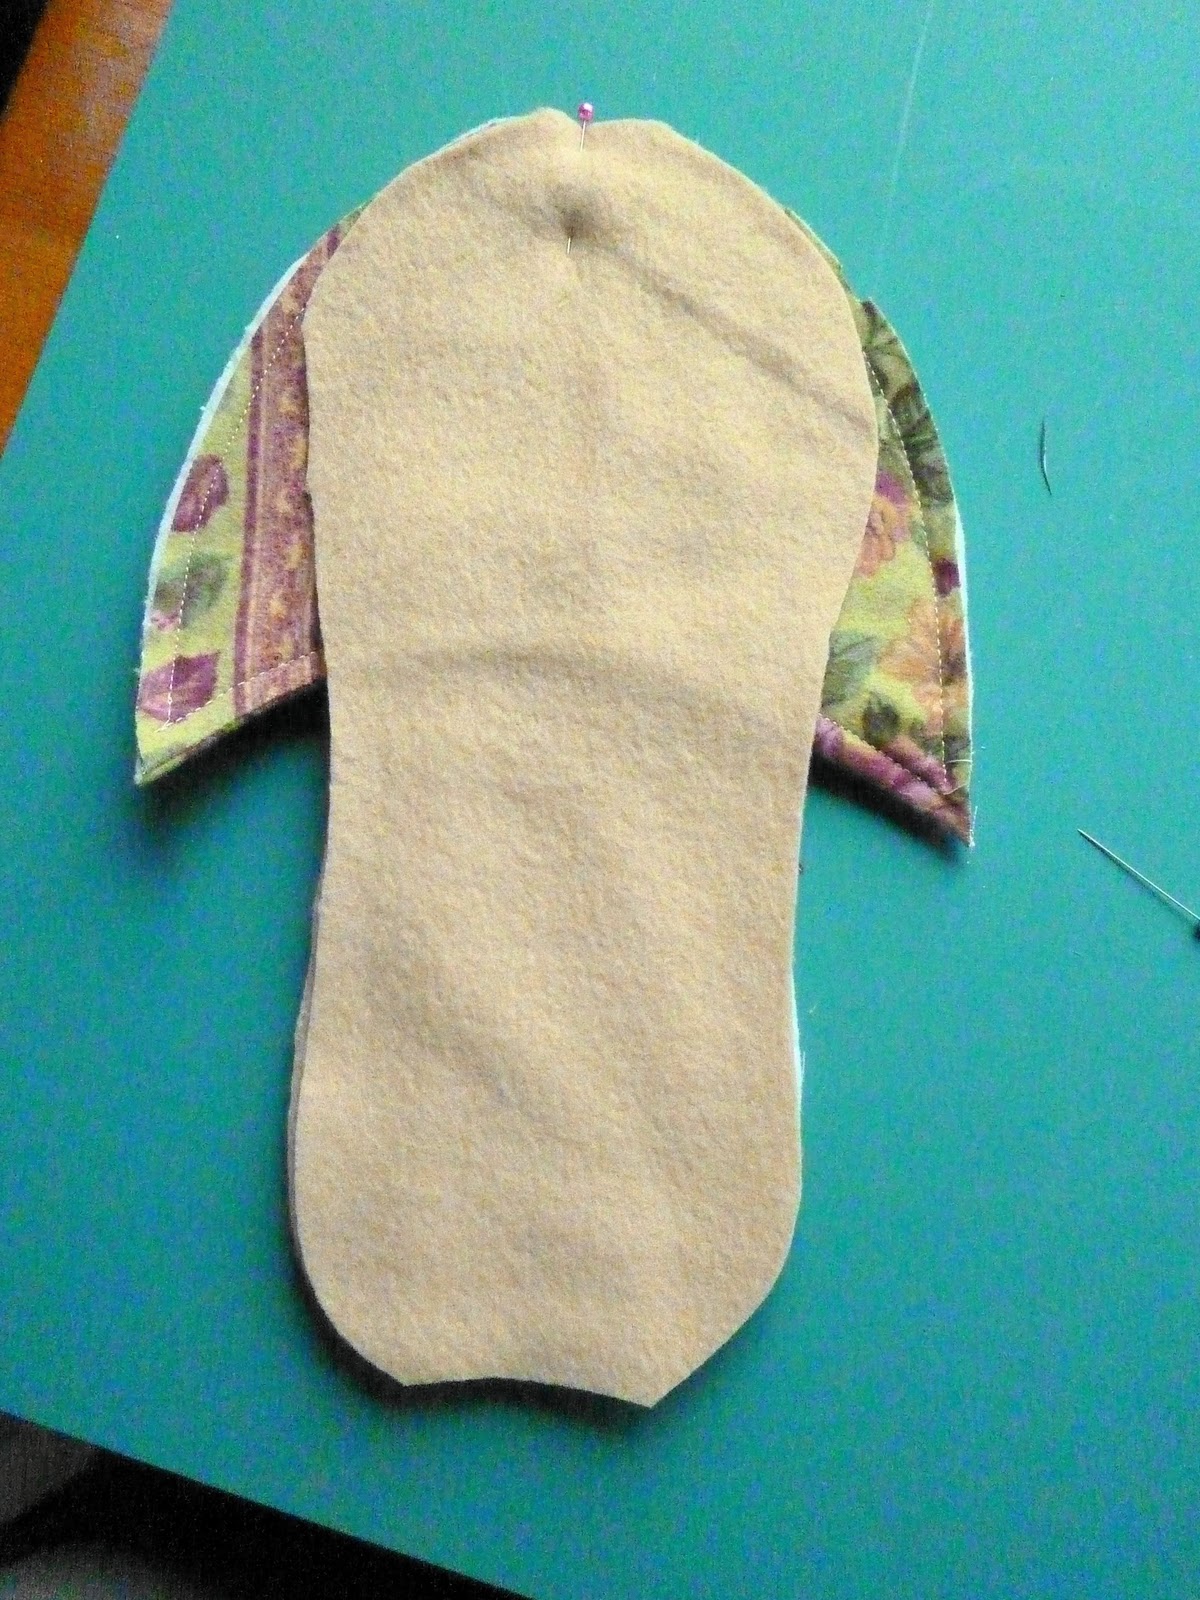
it will look like this (below), begin to pin all layers together
pin around one side to the heal, tucking and aligning the edges
as you go around the other side aligning the edge of the toe to the edge of the sole
you will need to tuck the center (like so) in order to bring to sole piece over to pin.
making sure to keep the end of the toe against the edge.
Leave an opening along one side like this, about 4 or so inches long so that you 
can turn the the slipper right side out.
like this.
Slipper turned and opening pinned to be hand sewn.

The pair.
Perhaps the addition of a bow?
Another pair.

The next pair will have orange flames.

I hope you have enjoyed the tutorial and will give making slippers a try.
They do not take very long, about an hour if your not taking
pictures.

May God Bless you richly

Friday, October 29, 2010

Marianne's Quilt - Part 7- the Finished Quilt

Here we have Marianne's finished quilt.
It turned out beautifully and as I write this,
the quilt is winging its way to it's new home.
 
This first picture is the completed quilt.
(It is laying across my bed so you are also seeing my log cabin underneath.) 
the front and the back
close up of the long arm quilting work
here you can see the color of the thread
one of the corners, with the binding, another look at the quilting design.
Yes, this is the same corner, but I wanted you to see the pink thread.  
(Remember you can click on the pictures to enlarge them.)
quilt back
close up of the quilting from the back side
The label

again the whole quilt.

I hope you have enjoyed the journey of making this quilt for Marianne.
It has been fun sharing it with you all.
Please join me as I make my daughters quilt.

May God bless you richly.

Wednesday, October 20, 2010

Split Nine Patch Quilt

Split Nine Patch Quilt

I am starting a new quilt.....well really I started it some time ago
this quilt is for my daughter and her hubby.
I had Samantha pick a pattern for this quilt and the colors to be used
  
The name of the pattern is Split Nine Patch 
you can find this pattern at 
the Quilters Cashe   here
this site is full of wonderful blocks for your use.

The color way for this quilt is, greens and browns.

I will be going through the process of making the quilt 

To begin
The pattern and alot of notes
I numbered the different patches and then numbered the fabric

The fabric, as you can see I began cutting the patches
 Cutting and sewing patch #6

 100 of patch #6 sewn together and separated into stacks of 10 each
 Sewing the remaining 32 patches of  #6

 The Thread  this is the thread that I will use to do the quilting 
it is Master Piece by Alex Anderson, Superior Threads
color #133  Meadow
it is a #50 Extra long staple Egyptian Cotton
Ok, that is it for this first installment of the Split Nine Patch Quilt
I hope you will come back and follow the process

God Bless

Saturday, October 16, 2010

Marianne's Quilt - Part 7

Part 7
Quilting.

A peek at what is happening on the longarm
a couple of close ups


One of the corners, notice the leaf design in the dark blue outside border.
and an all over feather design for the center.
Ok, back to work on the long arm, we are getting there Marianne.  

May God bless your day.

Friday, October 08, 2010

Slippers for Christmas

Christmas projects are underway.
I decided to make slippers for all the grand kiddos this year.
I found several patterns I like and this is one that says comfy to me.

This first pair is for Codey who is our youngest.
Five more pairs to go.
If you like this pattern it is called 
from Keepsake Quilting


Monday, October 04, 2010

Marianne's Quilt - Part 6

Welcome to Part 6 of Mariann's quilt progress.
The quilt is on the longarm and quilting will start tomorrow morning
I tried to take a straight on picture, 
it is to close, so it looks like the quilt dips on the sides,
BUT
surprise, it doesn't.

As you look at this next picture you can see the bed of the longarm machine
I won't go through the steps of loading the quilt
each machine is different.
I will tell you that the backing is rolled onto the two rollers.
Then, I 'float' the batting and top.  Floating, just means
that the top and batting are not rolled onto rollers, but
layered on top of the backing and they just 'float' there.
Of course once I start sewing...er, quilting....the layers will then become one.
Here is the thread I will be using.
"So Fine", by Superior Threads
Rose Petal # 416
isn't it pretty, I fell in love with it right away.
So, tomorrow I will begin quilting and will take pictures so you can see that process.

Thank you so much for stopping by.

God's blessings to you and yours.