Welcome to Big Horn Mountain Creations and Quilting......Quilt Stylist

Welcome to Big Horn Mountain Creations, Quilting and Embroidery.
Custom quilts and embroidery, also longarm quilting service. No two quilts alike, made especially for you. Feel free to contact me if you want a special work of art for yourself.
Grab a cuppa and enjoy the quilts.

Wednesday, August 25, 2010

Marianne's Quilt - An Opps

Well, so much for getting all 4 corner blocks done.
When I layed out the blocks to put together this second large block
I noticed a problem, boy am I glad I have not
sewn anymore corner blocks!

Look at the top block.
now
Look at the finished block below that is correct. 

Notice the left blocks (the right ones are ok)
can you see what is wrong? 

Now I need to take these two left blocks apart and rearrange the triangles.
So when I make the remaining blocks with the dark strip
running over the top, they have to be done differently then 
the ones with the light strip running over the top. 
Can you see how I need to change them around?

It is always a good idea to do one block of a quilt 
to 'practice' the construction.  In this case I needed
to do 2 practice blocks, before going gang busters sewing things together.
I really had a time organizing these corner blocks
and now I can see I still need to change something.
 
This pattern is not difficult, unless you change it up like I did.  
When your challenging yourself with a change 
of a pattern like this it really does make sense to take your time as 
there may be unforeseen things to work out.

  I am so gladI found this now, 
before I sat down and sewed up the 
left corner blocks all wrong.
So now to fixing them.

Until next time...........God Bless.

Friday, August 20, 2010

Marianne's Quilt - Part 3


Happy Pink Saturday

Hi!      How are you doing?
All is well here, some work progressing on the quilt.
Are you ready for part 3?

Please feel free to ask any questions, I will do my best to answer them.

Here we go, lots of pictures.......
Today we are going to cut and sew up a set of the corner blocks.
We start by cutting strips of fabric 5 1/4 inches wide.
I have 3 different fabrics stacked, hold down on the edge of the ruler
firmly so that the fabric doesn't scrunch, be very careful
that rotary cutter blade is very sharp, even when it is dull.
 Trim off the uneven edges, make sure the ruler is square.

Turn you strip, so that it is in the right position for cutting
and line up the ruler to cut at 5 1/4 inches.
This is still 3 layers thick so each cut gets me 3 blocks.
 Switching to a smaller ruler for better control, I cut the squares
in half, to create triangles.  You will need 2 triangles for each block
After cutting the triangles, needed, (which I need 4 corner blocks to construct 14 large blocks
and there are 2 triangles needed for each corner block, I will let you do the math).

The next step requires cutting strips of dark blue and aqua.  You need one
9 1/2 x 2 inch strip for ever 2 triangles, no biggy?
But wait, we need to make half of them the dark and half the light color
you will get 4 strips out of a 44 inch strip, so cut (in my case) 13 - 44 inch
strips of each color, then cut that in fourths.  
In the picture above I have 4 strips, you will see why in a few minutes.
The next step is to fold everything in half and press, right sides together.
I have put the aqua strips aside for now, as we begin working with the dark first.
On half of the blocks I will reverse the order of the colors, this will create the weaving of the lattice.
Each large block will have 2 with dark running through and 2 with light.
Clear as mud?  It will become clear in a bit.
See the reason for the pressing, you now have the center of everything and
you can line them up!
Placing right sides together and lining up centers, stitch a 
triangle to the long side of a dark strip, using a scant 1/4 inch.
Be careful not to stretch the fabric, yours will look like the one above.
In my case I need to sew a printed pink to one strip and a dark pink to another.
Next................

You will put another triangle on the other side, like this, keeping the printed
fabrics together and the dark pink together.
Cut, like shown
Now put a printed half with a pink half.
Bring back the aqua strip, that was folded and pressed,
put a print and a pink like shown
Begin sewing each half to an aqua strip, like this.  For my change up
I need to put a print on one side and a pink on the other.
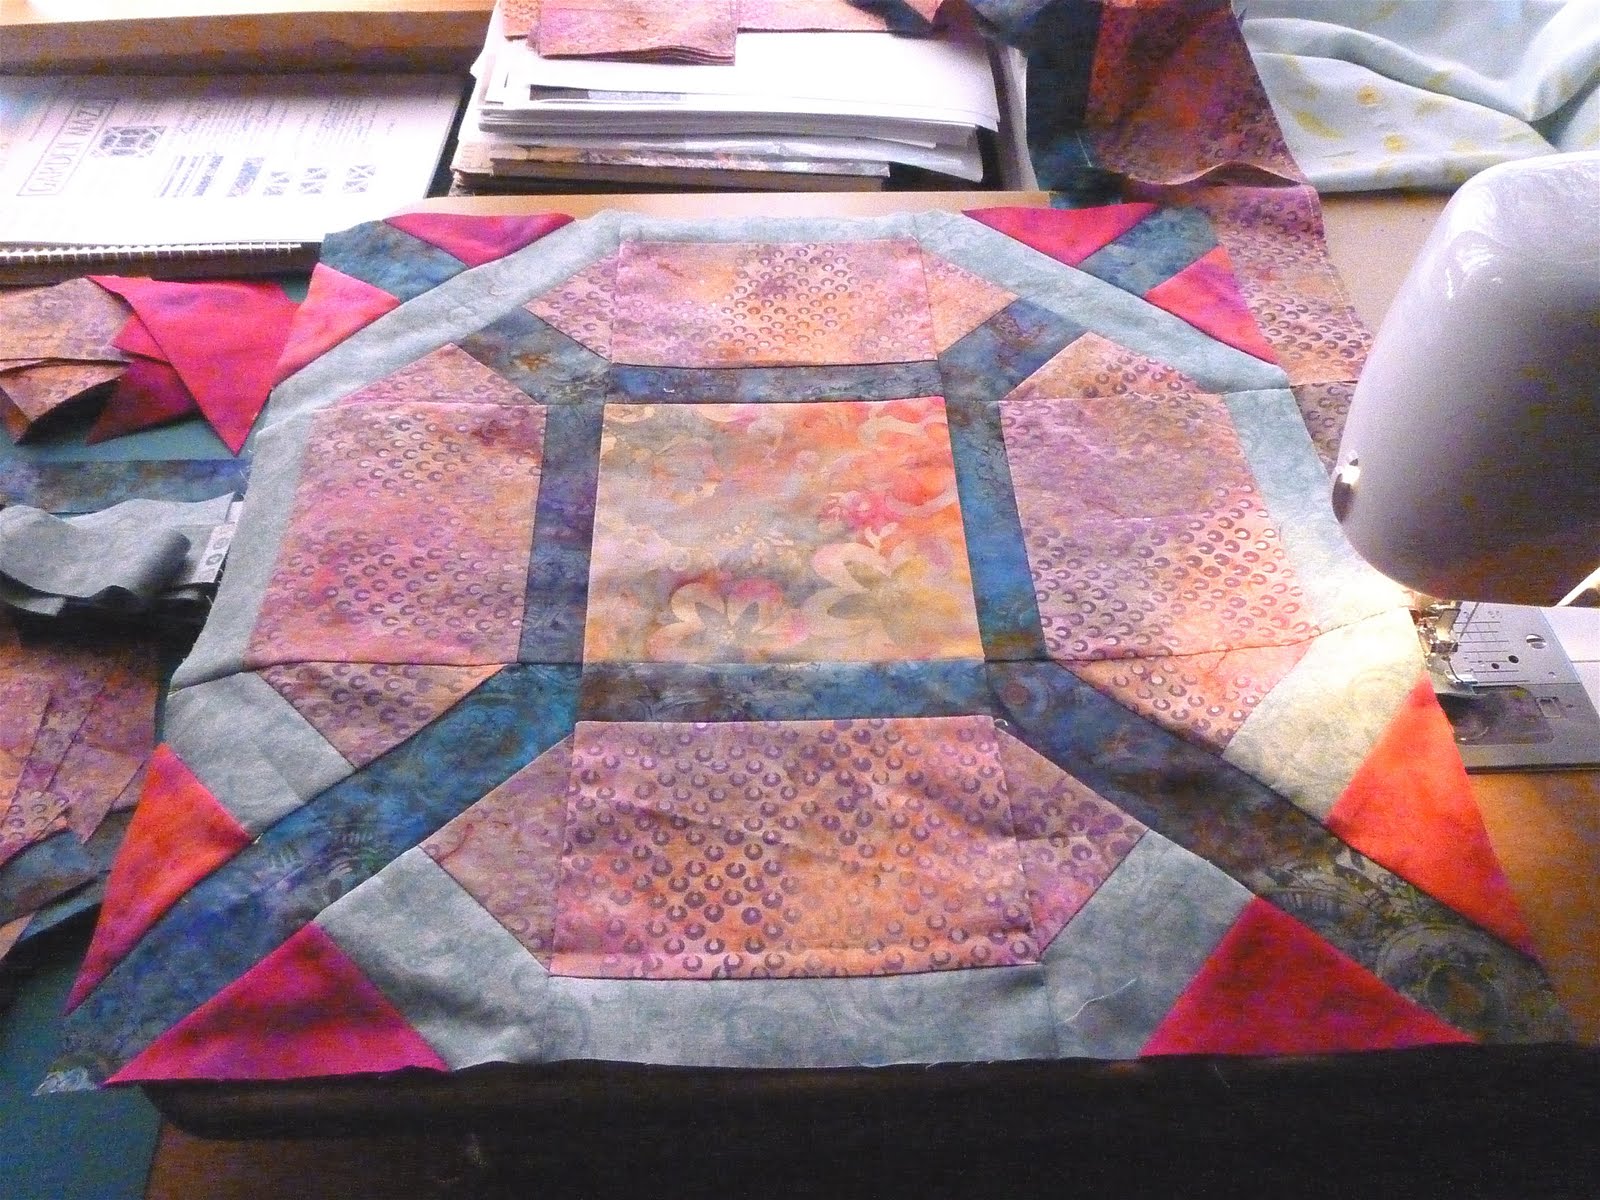
Here is the completed block, do you see how the dark seems to run under
the aqua.  I folded and pressed the block to find the center.
Now it is time to trim the block, to square it.
The reason I needed to find the center is so I could get a true square.
This is a 6 1/2 inch unfinished block, so I need to trim it up (or down) to that
size, once it is sewn into the quilt top it will be a 6 inch block, because each seam is
1/4 of an inch.   So I need to find center to place my 3 1/4 inch mark 
there (click the picture to enlarge).  I also made sure that the 45 degree
marks on the ruler were centered.
Almost done.....
Trim side and top, now turn the block
Line up the cut edges with the ruler markings at 6 1/2 inches, trim.
Here is the squared up block, you have created 2 blocks, now do this again
except reverse the placement of the aqua and the dark blue.
Once you do that you will have.........
These.  So now I need to do this 13 more times.
Of course I have everything cut now, just have to sew them together.

That is it for this time. 
Thank you so much for sticking around, if you have any questions please feel free to ask.

I hope you have enjoyed making these blocks with me.
Please visit Beverly our pink-0-lishish  hostess
for  Pink Saturday over at How Sweet the Sound
and 
Miss Rossie at Fresh Modern Quilts 
our hostess for the Process Pledge.

May God bless you and keep you......until next time.

Tuesday, August 17, 2010

Two Cute Give-a-ways

My friend Candi is having a give-a-way, well really she is having 2

on her blog  Quilts N Things 
she is giving away 3 cute windmills
Also
on her blog   Candi's Eye Candi

Aren't these cute.  Go over and visit Candi and sign up for the drawings
                                                                                Good luck.

Friday, August 13, 2010

Marianne's Quilt - Part 2

Welcome to the second installment of  making Marianne's quilt.

I wanted to mention, that I am linking this post to the Pink Saturday
blog Party over at Beverly's How Sweet the Sound
I have been taking part in this fun blog party for several months now.
I have re-routed my post from my Decorating My Tin Shack blog over here
so I can share this pink quilt with everyone. 

Here is the finished block (read part 1 for how I got to this point)
Pretty isn't it!
But there are some problems that will require me to take the block apart
first, it never pays to put the cart before the horse, 
things just do not work out well when you do.
I know the block looks fine, until you begin to look real close.
things are shifted this way and that, not lining up right,
go ahead look close, click on the picture to make it bigger
yep, I got the cart before the horse.
I did not trim my pieces up
I was in such a hurry to see how it would look sewn together.
I do have a tendency  to be a little impatient, 
especially with such pretty fabrics.

 I took, the top and bottom row off and took apart the blocks and trimed them up
and put them back together, being very careful to line things up.
I know it may be harder to see in this picture, but trust me it is alot better.
Why go to all the trouble, because I want to do the best job possible.
Now that I have the mechanics of the block down, and 
I have ironed out the kinks, lets get to the 
the other 14 blocks that will
make up this quilt.

 Cutting begins and sewing begins. 
upper left -center square
triangles for the corners
strips for the middle blocks and 
some of the middle blocks sewn.

So we have 14 blocks, with 4 corner blocks and 4 side blocks,
that is 56 of each to make the 14 remaining large blocks
and to make the 56 small corner blocks I will need 
224 triangles, half in pink and half in fuchsia. 

Today we are going to work on the 56 side blocks
so I cut 9 strips of the aqua and 9 strips of the dark blue fabric
each 1 1/2 inches wide by the width of the fabric (44")
but as always, getting my cart before the horse.  When I cut the 9 strips of pink fabric
which is 5 1/4 inches wide, I cut them to length of 6 1/2 inches.
Why is this not right?
Well, it is ok to do it this way but if one wants to strip piece, one should have left the
strip 44" long. 
Then I could have sewn the aqua strip on one side and the blue strip on the other side of the pink strip
and
THEN cut them to the 6 1/2 inch length, but no not me!

So instead here is how I did it.
I sewed the cut block to the strip of 1 1/2 aqua (I already did the blue but forgot to
take any pictures).  You will note the pile of completed pieces behind the sewing machine,
I did those while I waited for my camera battery to charge.  LOL.
This picture shows you the pieces joined and in the process of pressing.
Press the seams toward the pink.
Some pressing tips.....first do not iron (pressing down hard and sliding iron across fabric)
ironing can stretch you fabric and we don't want to do that, so press please
There is a 'school of thought' that one should press the seam before 
opening it up to press, this is said to set the stitches into the fabric.
Another note:  In quilting we do no open the seams like you would in garment construction
we press them to one side together.
Before pressing.
After pressing.  
I can see a difference, but I do not know if the reason behind it
is important.  I do it because I was taught that way and I feel like I am
skipping a step if I don't do it.  You decide, better yet, tell me if you press first or not.

So now because I got the cart before the horse I get to cut these apart for the third time 
when I could have done it only once.  Sigh.
Cutting these apart is pretty straight forward except that I have to make two cuts
do you see how much more work I made for myself?

I will begin working on the corner blocks next (once I finish cutting the side blocks apart)
lets see if I can keep the cart and the horse in the right order.

Until next time...........

Please go over and visit with Beverly and the other Pink posters at 
and 
head on over to Rossie's for more Process Posts.

May God bless you richly.

Thursday, August 12, 2010

Marianne's Quilt - Part 1

I HAVE TAKEN THE PLEDGE!

Rossie has issued a challenge, it is called the 

The idea is to share the steps of your project, not just he finished picture.
Yes, this does require some extra work
I think it will be worth it and mostly hope it will encourage others to try quilting.

So here we go.......

My first Process Pledge post is the work I am doing
on Marianne's quilt.

This is a commissioned quilt, my second.
When we talked about colors Marianne wanted her quilt to be pink, she then enlisted
the help of her daughter to pick the colors, Leslie went fabric shopping
and brought me beautiful pinks, teal, aqua and turquoise fabrics
Next I went 'shopping' for a pattern to use
I did my 'shopping' over on The Quilter's Cashe
on this site Marcia has hundreds of quilt patterns for your use, some are well known 
patterns and others Marcia has created.  The pattern I chose is called
Garden Maze
you can find the pattern here

This is a intermediate pattern because it has alot of pieces, but me being me, I had to
kick it up a notch or two.  Marica gave several different variations on this and I had to go and combine a couple of them.  Well let me show you the pattern I printed off.
Remember this pattern is free at The Quilter's Cashe

There are 3 pages to this pattern and as you can see I make notes and highlight
the pattern so I hopefully will not miss any important information.
I note my fabric and what position it will play in the quilt
for this quilt, she had 2 fabrics, I am using 5 fabrics 
(I just increased the difficulty level 2 1/2 times) 
you will see why soon.

Page 2 of the pattern

More notes and I got out my colored pencils and colored parts of the pattern so I can follow my design
this pattern has two lattice type designs I want them to be different colors
and to weave in and out of each other.  So my lattice are light aqua and dark turquoise/blue
this will give me depth and alot of movement in the quilt.
I colored the part that will be dark with a dark blue pencil.
this way I can refer to this while piecing

on page 3

you can see some of the ideas for kickin up the design and one of them was to
put different colors in the corner of the block.  Well I like that idea, too.
I am putting fuchsia  in the corners, jewels of fuchsia .
so this kicked the difficulty up yet another 2 notches
at least for my pea brain it did.


I know your saying that is only 3 of the 5 colors, let me show you the finished block.

Ok now you can see the 5 fabrics.  Can you see how the lattice will weave?
It was not easy getting here, it seems straight forward when
you look at it but when one (at least this one) goes to execute  it
well that is another story, 

to help get things straight in my mind on how I was going to do this I drew it out in my idea book
made more notes and changes, began to cut the fabric for 1 and only 1 block
and I still did it wrong, because then I had to remember that one corner block went one way and the other another, that one had dark blue through the center the other aqua, 
after several tries and head scratching I had it, or so I thought
so I started sewing the block together, and 
nope, that is not right.  Out came the ripper again, take it apart.  Now if I put those fuchsia triangles here
and the pink ones where the fuchsia ones were, no-no thats not it,
put one pink on here and that one fuchsia one
where the pink one was.  Finally, ya.

Sew the block together...............it looks so pretty, but wait

 to be continued...........

Wednesday, August 11, 2010

I took the Process Pledge

The Process Pledge
What is the Process Pledge, you ask? 

Click on the button and visit Rossie at Mutant Quilting and she will share the details
perhaps you will want to take the pledge, and really folks it is not just
about quilting, share your scrapbooking, sewing cloths, curtains,
gardening, cooking, what ever it is that makes you purr.

My first Process Post will be coming up soon.  
First I need to go pay the bills, and I don't think you want to see that process.

Stay tuned.