Welcome to the second installment of making Marianne's quilt.
I wanted to mention, that I am linking this post to the Pink Saturday
blog Party over at Beverly's How Sweet the Sound
I have been taking part in this fun blog party for several months now.
I have re-routed my post from my Decorating My Tin Shack blog over here
so I can share this pink quilt with everyone.
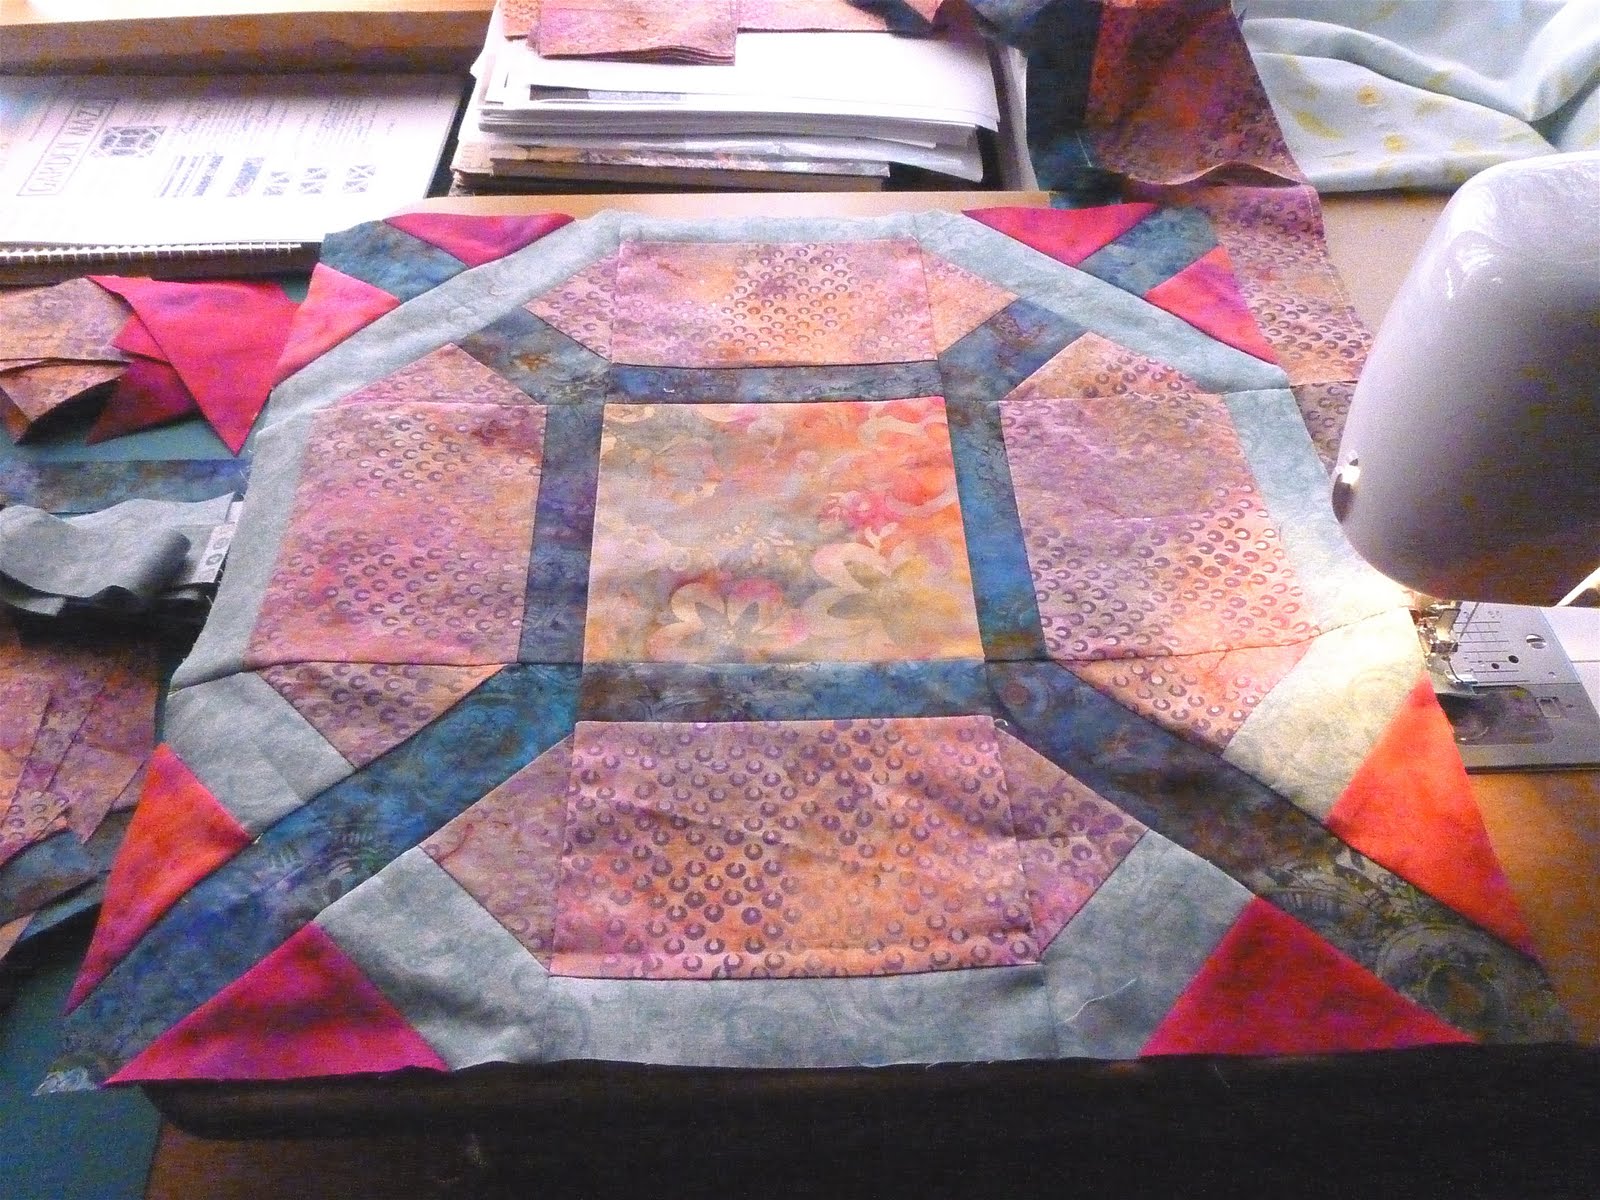
Here is the finished block (read part 1 for how I got to this point)
Pretty isn't it!
But there are some problems that will require me to take the block apart
first, it never pays to put the cart before the horse,
things just do not work out well when you do.
I know the block looks fine, until you begin to look real close.
things are shifted this way and that, not lining up right,
go ahead look close, click on the picture to make it bigger
yep, I got the cart before the horse.
I did not trim my pieces up
I was in such a hurry to see how it would look sewn together.
I do have a tendency to be a little impatient,
especially with such pretty fabrics.

I took, the top and bottom row off and took apart the blocks and trimed them up
and put them back together, being very careful to line things up.
I know it may be harder to see in this picture, but trust me it is alot better.
Why go to all the trouble, because I want to do the best job possible.
Now that I have the mechanics of the block down, and
I have ironed out the kinks, lets get to the
the other 14 blocks that will
make up this quilt.

Cutting begins and sewing begins.
upper left -center square
triangles for the corners
strips for the middle blocks and
some of the middle blocks sewn.
So we have 14 blocks, with 4 corner blocks and 4 side blocks,
that is 56 of each to make the 14 remaining large blocks
and to make the 56 small corner blocks I will need
224 triangles, half in pink and half in fuchsia.
Today we are going to work on the 56 side blocks
so I cut 9 strips of the aqua and 9 strips of the dark blue fabric
each 1 1/2 inches wide by the width of the fabric (44")
but as always, getting my cart before the horse. When I cut the 9 strips of pink fabric
which is 5 1/4 inches wide, I cut them to length of 6 1/2 inches.
Why is this not right?
Well, it is ok to do it this way but if one wants to strip piece, one should have left the
strip 44" long.
Then I could have sewn the aqua strip on one side and the blue strip on the other side of the pink strip
and
THEN cut them to the 6 1/2 inch length, but no not me!
So instead here is how I did it.

I sewed the cut block to the strip of 1 1/2 aqua (I already did the blue but forgot to
take any pictures). You will note the pile of completed pieces behind the sewing machine,
I did those while I waited for my camera battery to charge. LOL.

This picture shows you the pieces joined and in the process of pressing.
Press the seams toward the pink.

Some pressing tips.....first do not iron (pressing down hard and sliding iron across fabric)
ironing can stretch you fabric and we don't want to do that, so press please
There is a 'school of thought' that one should press the seam before
opening it up to press, this is said to set the stitches into the fabric.
Another note: In quilting we do no open the seams like you would in garment construction
we press them to one side together.

Before pressing.

After pressing.
I can see a difference, but I do not know if the reason behind it
is important. I do it because I was taught that way and I feel like I am
skipping a step if I don't do it. You decide, better yet, tell me if you press first or not.
So now because I got the cart before the horse I get to cut these apart for the third time
when I could have done it only once. Sigh.

Cutting these apart is pretty straight forward except that I have to make two cuts
do you see how much more work I made for myself?
I will begin working on the corner blocks next (once I finish cutting the side blocks apart)
lets see if I can keep the cart and the horse in the right order.
Until next time...........
Please go over and visit with Beverly and the other Pink posters at
and
head on over to Rossie's for more Process Posts.
May God bless you richly.
6 comments:
Beautiful! Have a great Pink Saturday! I am featuring you as a link in my post this week!! Love the quilt, I love them but I cannot find it in me to make one! I am glad others do!
Hugs, Lisa
Gorgeous fabric, this quilt will be awesome when done.
Have a wonderful PS summer weekend!
TTFN ~ Hugs, Marydon
Happy Pink Saturday Gail sweetie...
What a gorgeous share this evening. Oh my how I envy that you are able to make something so beautiful. I wanted to learn to quilt, but Grandma passed away before I had a chance to learn. She was the quilter in the family.
Moma has been learning from a dear friend, and I hope to get to go home in the Fall and maybe she will spend some time sharing her knowledge with me.
What a beautiful pattern, beautiful choice of colors. I love it sweetie.
Many thanks for sharing this evening. Have a gorgeous Pink Saturday.
Country hugs and much love, Sherry
Just gorgeous!!
How talented you are!!
Debbie
HAPPY BELATED PINK SATURDAY GAIL,
BEAUTIFUL QUILT...I LOVE THE COLORS VERY MUCH AND THE PATTERN IS AWESOME
I NEVER LEARNED TO QUILT...I DON'T EVEN SEW EXCEPT BY HAND, SO I CERTAINLY RESPECT THE WORK YOU PUT INTO CREATING A QUILT.
HUGS
SIMPLY DEBBIE
I just found your blog and I love it ! You do fantastic tutorials, I have signed on as a Follower so I won't miss any of your creations. Have a great day, my friend.
Post a Comment